Description
We pieced together a kit that will ensure ALL your seeds germinate properly, and as fast as possible. No more waiting days. No more drowning seeds. No more wasting money on seeds that went moldy from low germination temps. This is the exact kit the whiteWIDOW team members have been using for years.
This kit does not PULSE the heat like other kits available on Amazon (making the temperature go up and down). It provides a very low power (1-5 watts) of CONSTANT heat. This is the perfect amount of power to keep seeds between 23-28C for fast germination.
This kit includes:
- An adjustable heat mat
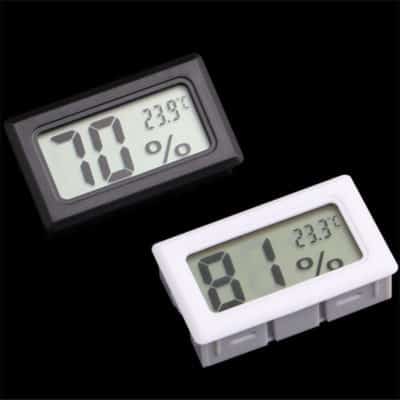
- Digital thermometer with long probe
- Seed container with multiple compartments (easily separate your strains)
The only thing you need to provide is a small box (12″ X 7″ minimum), some paper towel, hydrogen peroxide (2%) from any dollar store, and distilled water.
INSTRUCTIONS:
The goal is to heat the AMBIENT air – and keep it at a constant temperature. Please give yourself a few hours to figure out the best setting on the temperature dial. Do not do any testing with seeds inside the box or you run the risk of cooking the seeds.
- Find a DARK location for your germination box where there is almost zero AIR MOVEMENT and where the temperature stays constant. Cupboards and closets work great. A place you can run the power cord easily to also helps.
- Place heat mat in box.
- Place 4 sheets of paper towel over top of heat mat.
- Place digital thermometer temperature probe on top of the paper towel.
- Place clear seed container on top of temperature probe (which is on top of paper towel)
- Run the electrical cord with temp dial, and digital thermometer display to the outside of the box. Make sure the box can close and absolutely no light will get in.
- Ensure temperature probe is still in correct position under the middle of clear container.
- Turn on heating mat and then increase temp 1/8 of a turn.
- Wait 30 minutes for the temperature to stabilize. The temperature will typically read near you ambient temps at the lowest power setting.
- The goal is to get the thermometer to read 26-28C constantly – with no fluctuations.
- Turn the dial up a TINY AMOUNT -> 1/16 of a dial turn. DO NOT MAKE LARGE CHANGES.
- Wait another 30 minutes for temperature to stabilize. (We recommend setting a timer on your watch or phone)
- If at any point you notice the temperature is 28C or greater, turn the dial down just slightly, and pay close attention to the box for the next 20 minutes
- Keep repeating until 26-28C temperature is achieved and stable.
- Using HOT water and and a small amount of bleach or hydrogen peroxide – clean the seed container so it is sterilized.
- Thoroughly wash your hands with soap. Cleaner is better.
- Open seed container, cut/tear small pieces of paper towel (preferably from a new package) that will fit inside each square in the seed container. Put paper towel in every square, even if you are not using them all. (It helps maintain humidity)
- Using clean TWEEZERS (not your fingers), put seeds in the seed container, and carefully arrange them so they are mostly centered, not touching each other, and are away from the walls of the container.
- We recommend numbering each container section with a permanent marker. Then write these numbers on a sticky-note and write the name of the seeds beside each number so that you know which section has which seeds.
- Cut/tear 1 more small piece of paper towel to fit over each seed. Place over seeds.
- Mix up water: Add 1 tablespoon of 2% hydrogen peroxide to 1/8 cup DISTILLED water. (Hydrogen peroxide provides additional oxygen to the seeds and really helps jump start them as well as keeps the seeds from molding)
- Drizzle water over paper towel + seeds and saturate all areas of paper towel.
- Put mixed water into a sealed, perfectly clean container/glass jar – in case you need more later.
- With the lid closed – slowly turn seed container vertical and drain off ALL EXCESSIVE WATER. This will take at least 120 seconds. Ensure all extra water has drained out. The only water left should be what is in the paper towel.
- Using tweezers, adjust the paper towel covering the seeds, ensuring the seeds have little pockets of AIR around them so they can breath. DO NOT LET PAPER TOWEL FULLY ENCASE SEEDS OR THEY MIGHT DROWN. You are trying to create a nice warm, humid environment where they can breath. Not drown them.
- Double check to see that seeds have not moved, or are touching each other, or the sides.
- Close lid on seed container.
- Drizzle extra water in unused areas of the container to keep the humidity high.
- Take thermometer probe and place it UNDER the seed container into one of the curved crevasses in the middle of the container.
- Monitor the temperature for the next 30 minutes to ensure it never goes over 28C.
- Check on the seeds every 24 hours. Take seed container out, and quickly hold up to a light to see if tap roots have grown. Ensure that the paper towel stays the same dampness as previously achieved when first starting the germination process. You may need to add a very small amount of water. Remember not to over saturate it!
- At no point let the paper towel dry out or your seeds will die.
- Do not expose to large amounts of light during this entire process. Work fast!
- Allow up to 10 days for your seeds to germinate. There is no rhyme or reason to how long it will take. It has nothing to do with how old or fresh a seed is. Stubborn seeds usually have an overly hard seed coat that is not allowing water in to start the germination process – making germination take considerably longer. Patience is KEY!
- The seeds are considered germinated when they have a tap root “tail” 4-6mm (max) in length. Do not remove if shorter. Have patience. You will have a higher chance of success if the tap root is 4-6mm when you transfer to your soil/coir/medium.
- Place germinated seeds in final soil / coir / medium. Ensure the water you are using is the proper PH.
- Unplug heat mat so you don’t burn your house down. 🙂 🙂
- Clean and sterilize the seed container with hot water and bleach before putting away.
- Add us to Instagram and tag us with your grow photos as you progress: https://instagram.com/whitewidow.rocks


Reviews
There are no reviews yet.